Roti Puff Simulator
Adjust the sliders to see how different techniques affect your roti.
You’ve kneaded the dough with care, rolled it out thin, and placed it on the sizzling tawa is a flat cast-iron or non-stick griddle used in Indian cooking.. You watch closely, waiting for that magical moment when the bread balloons into a perfect sphere. Instead, it stays stubbornly flat. Maybe it even burns before it has a chance to rise. It’s frustrating, especially when you’re hungry and want that fluffy, cloud-like texture that makes rotis so delicious.
This isn’t just bad luck. There are specific scientific reasons why your roti is a traditional unleavened flatbread made from whole wheat flour. refuses to puff. It usually comes down to three things: the dough consistency, the heat management, or the rolling technique. Once you understand how steam pressure works inside the bread, you can fix the problem permanently.
The Science of the Puff: Steam Pressure
To get your roti to puff, you need to create an explosion of steam inside the dough. Here is how it works. When water in the dough hits high heat, it turns into steam. Steam takes up much more space than liquid water. If the dough is sealed properly and heated quickly, this expanding steam pushes against the layers of the roti, forcing them apart and creating that beautiful balloon shape.
If the heat is too low, the water evaporates slowly as moisture rather than explosive steam. If the dough is too thick, the steam escapes through tiny cracks instead of lifting the whole structure. If the gluten network is too tight, the steam can’t expand the bread without tearing it. Understanding this simple physics lesson helps you troubleshoot any issue that arises in the kitchen.
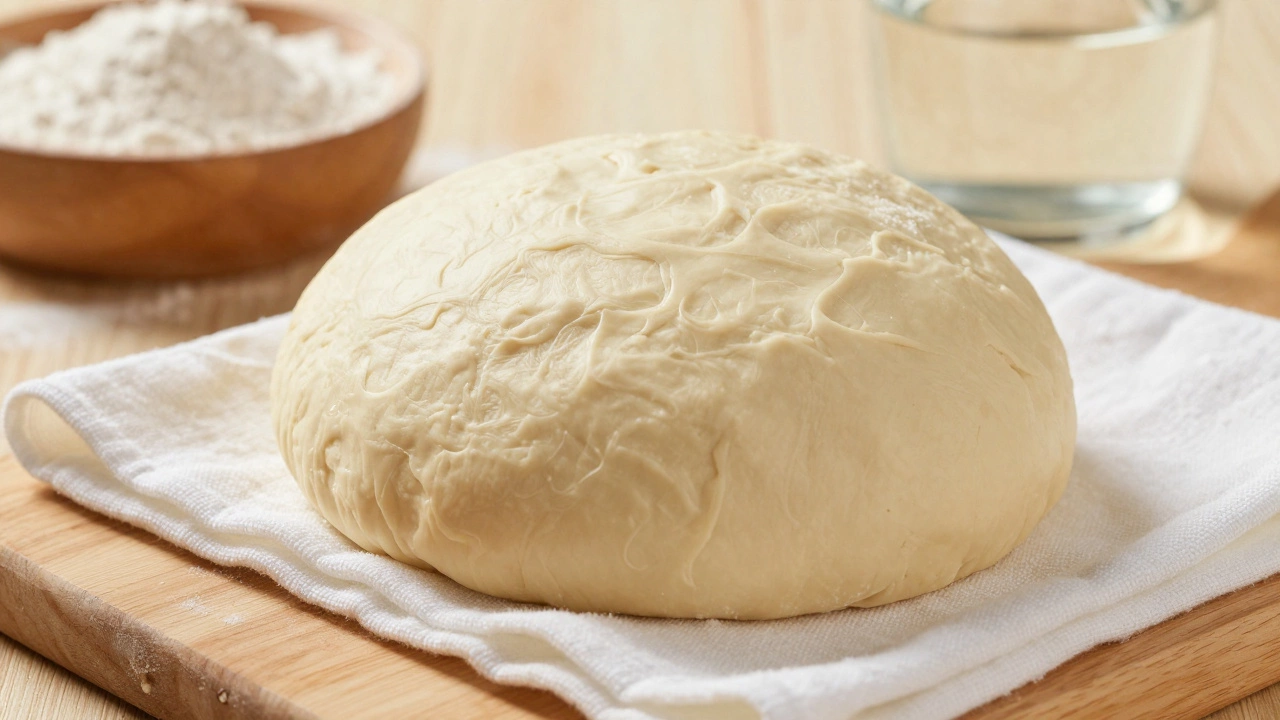
Dough Consistency: The Foundation
The most common reason for flat rotis is incorrect dough hydration. Many people make their dough too stiff because they fear sticking. However, a stiff dough lacks the elasticity needed to stretch and trap steam. Conversely, if the dough is too soft, it becomes sticky and difficult to roll thin enough for quick cooking.
- Too Stiff: The dough feels hard and resists rolling. It creates micro-tears that let steam escape. Result: Hard, flat roti.
- Too Soft: The dough sticks to the rolling pin and tears easily. Result: Uneven cooking and burnt spots.
- Just Right: The dough should feel like the tip of your nose-soft, pliable, and slightly tacky but not sticky.
Use warm water for kneading. Cold water tightens the gluten strands, making the dough elastic but tough. Warm water relaxes the gluten, allowing the roti to stretch easily. Knead for at least seven to ten minutes. This develops the gluten structure enough to hold the steam pocket without being rigid. After kneading, cover the dough with a damp cloth and let it rest for twenty minutes. Resting allows the flour to fully absorb the water and the gluten to relax, which is crucial for puffing.
Rolling Technique: Thin and Even
How you roll the roti matters just as much as the dough itself. If one part of the roti is thicker than another, that area will cook slower. The thinner parts will burn before the thicker center has time to puff. You need uniform thickness across the entire surface.
Avoid pressing too hard while rolling. Pressing traps air bubbles unevenly and can damage the gluten structure. Use light, circular motions. Start from the center and move outward. Flip the roti occasionally during rolling to ensure both sides get equal attention. If you see cracks forming, sprinkle a little dry flour (maida) on top, not underneath, to prevent sticking.
Don’t roll it paper-thin. A roti needs some substance to hold the steam. Aim for a thickness similar to a standard tortilla. If it’s too thin, it will crisp up like a cracker before it puffs. If it’s too thick, the outside will burn before the inside generates enough steam pressure.
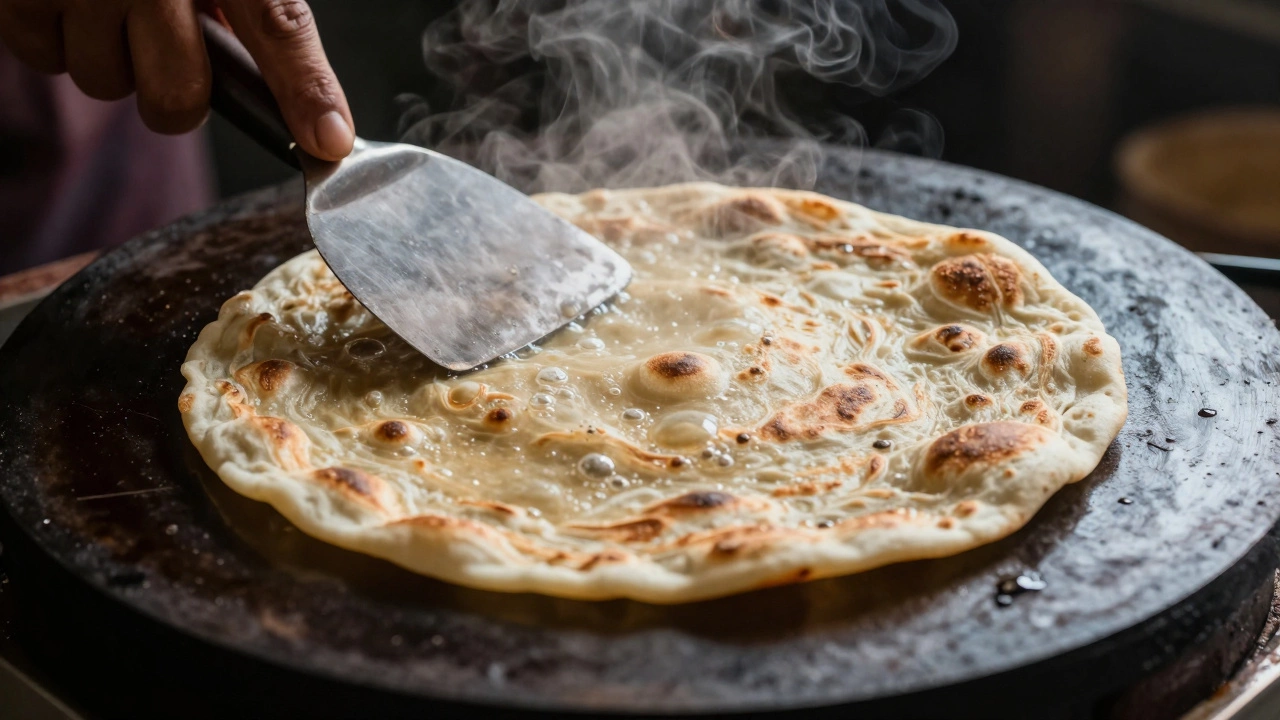
Heat Management: High and Fast
Heat is the engine of the puff. Low heat is the enemy of fluffy roti. On a gas stove, you need medium-high flame. On an electric or induction cooktop, you need high setting. The tawa must be hot before you place the first roti on it.
Test the heat by sprinkling a few drops of water on the tawa. If they sizzle and evaporate instantly, it’s ready. If they sit there, it’s too cold. Place the rolled roti on the hot tawa. Do not touch it immediately. Let it cook for about thirty seconds until small bubbles start to form on the surface. These bubbles indicate that steam is generating inside.
Flip the roti. Cook the second side for another thirty seconds. Now, here is the critical step. Push the edges gently with a spatula to encourage air entry, then flip it again. For the final puff, many cooks lift the roti and place it directly over the open flame for a few seconds. This direct, intense heat causes the trapped steam to expand rapidly, popping the roti into shape. If you don’t have a gas flame, use a lid. Cover the roti on the tawa with a tight-fitting lid for ten to fifteen seconds. The trapped heat acts like an oven, helping the roti puff from the residual steam.
Common Mistakes to Avoid
Even with good dough and heat, small errors can ruin the result. Here are the top pitfalls that keep rotis flat.
| Mistake | Why It Fails | The Fix |
|---|---|---|
| Using old flour | Freshness affects gluten strength and absorption. | Buy fresh whole wheat flour (atta) every month. Store in airtight containers. |
| Adding salt early | Salt tightens gluten strands, making dough tough. | Add salt after kneading or mix it well with flour before adding water. |
| Cold tawa | No immediate steam generation. | Preheat the tawa thoroughly before starting. |
| Over-flipping | Disrupts the cooking process and releases steam prematurely. | Flip only three times: once to cook bottom, once to cook top, once to puff. |
| Dry dough | Not enough water to create sufficient steam. | Add water tablespoon by tablespoon until the dough reaches the right consistency. |
Flour Quality Matters
Not all whole wheat flours are created equal. In South Africa, where I live, finding authentic Indian-style atta is finely milled whole wheat flour specifically designed for flatbreads. can be tricky. Regular wholemeal flour often has larger bran particles that cut through the gluten network, preventing the roti from stretching and trapping steam.
Look for flour labeled as "fine grind" or "double sifted." The finer the flour, the smoother the dough, and the better the puff. If you can only find coarse whole wheat flour, try mixing it with a small amount of maida is refined wheat flour with high gluten content. (about 10% ratio). The maida adds elasticity and strength to the dough, helping it hold the steam pocket. However, pure atta should still puff if the technique is correct.
Troubleshooting Specific Scenarios
Sometimes the issue isn’t the dough or heat, but environmental factors. Humidity plays a surprising role. In humid climates like Cape Town in summer, flour absorbs moisture from the air. You might need less water than usual. In dry winter months, you might need more. Adjust your water quantity based on how the dough feels, not just measurements.
If your rotis puff but then deflate immediately after taking them off the heat, they are likely undercooked inside. Ensure you cook them long enough on both sides before attempting the final puff. Another sign of undercooking is a raw, doughy smell. Cook until you see brown spots on both sides.
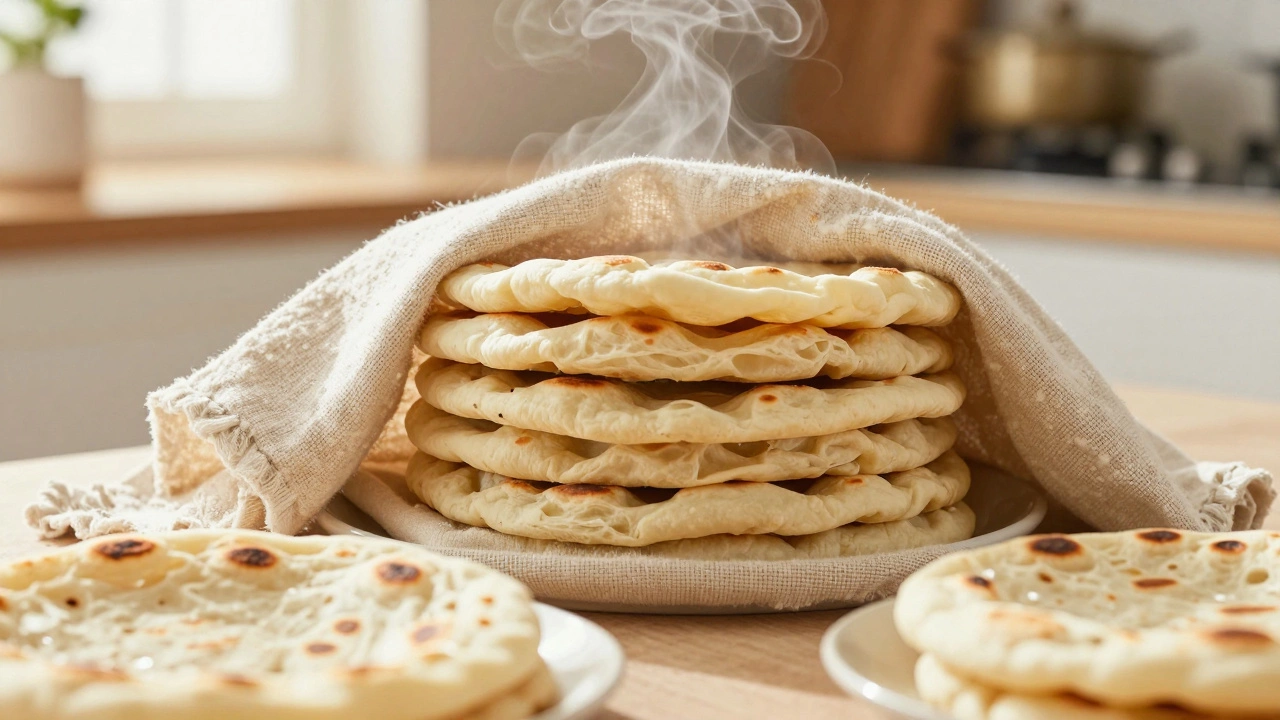
If the rotis puff but are hard as stones after cooling, the dough was likely too stiff or not rested enough. Always wrap cooked rotis in a clean cotton cloth immediately. The residual steam keeps them soft. Leaving them exposed to air dries them out instantly.
Pro Tips for Consistent Results
Practice makes perfect, but these tricks can speed up your learning curve.
- Oil the Tawa Sparingly: A lightly oiled tawa helps, but too much oil prevents the roti from sticking slightly, which is needed for the initial seal. Brush with a minimal amount of ghee or oil.
- Use a Spatula Wisely: Press the edges of the roti with a spatula while it’s on the flame. This forces air into the center, aiding the puff.
- Keep Dough Covered: While rolling one roti, keep the rest of the dough covered. Dried-out dough won’t puff.
- Rest Between Batches: If you’re making a large batch, let the tawa cool slightly between rotis to maintain consistent heat control.
Remember, making roti is a skill that improves with repetition. Don’t get discouraged if your first few batches are flat. Analyze each failure. Was the dough too hard? Was the tawa cold? Adjust one variable at a time. Soon, you’ll develop a feel for the dough and heat that results in perfectly puffed rotis every time.
Can I use regular whole wheat flour instead of atta?
Yes, but results may vary. Regular whole wheat flour often has coarser bran that can weaken the gluten structure. For best results, blend it with a little refined flour (maida) or sieve it twice to remove larger particles. Fine-grind whole wheat flour works closest to traditional atta.
Why do my rotis puff but then go flat again?
This usually happens if the roti is undercooked inside or if the dough is too thick. The steam escapes quickly once the heat source is removed. Ensure you cook both sides thoroughly until brown spots appear before attempting the final puff. Also, wrap them in a cloth immediately to retain moisture and shape.
Should I add oil or ghee to the dough?
Adding a teaspoon of oil or ghee to the dough can make the roti softer and easier to roll, but it is not necessary for puffing. In fact, too much fat can interfere with gluten formation. Stick to water for the best structural integrity unless you prefer a richer taste.
How long should I rest the dough?
Rest the dough for at least 15 to 20 minutes. This allows the flour to fully hydrate and the gluten to relax. Rushing this step leads to tough dough that resists stretching and trapping steam. Cover the dough with a damp cloth to prevent drying.
Can I make roti without a gas stove?
Absolutely. Electric and induction stoves work fine, but you need to manage heat carefully. Preheat the tawa longer to ensure it’s hot enough. Since you can’t place the roti directly on a flame, use a tight-fitting lid on the tawa for the last stage of cooking to trap steam and encourage puffing.