So you're on a quest for the softest roti? You're in the right place! What keeps that perfect roti soft is a blend of ingredients, technique, and maybe a bit of love. Let's talk about flour first. Did you know that not all flours are created equal? For roti, using whole wheat flour labeled 'atta' is key. It's finer and works wonders for that soft texture you're after.
Next up is the dough. It's all about hydration here. Believe it or not, a little extra water can be the difference between tough and tender. Start by adding water slowly until your dough is supple, not sticky. You'll get the hang of it pretty quickly with practice.
- Choosing the Right Flour
- The Secret of Dough Hydration
- Kneading Techniques
- Controlling Cooking Temperature
- The Art of Roasting
- Storing Rotis for Freshness
Choosing the Right Flour
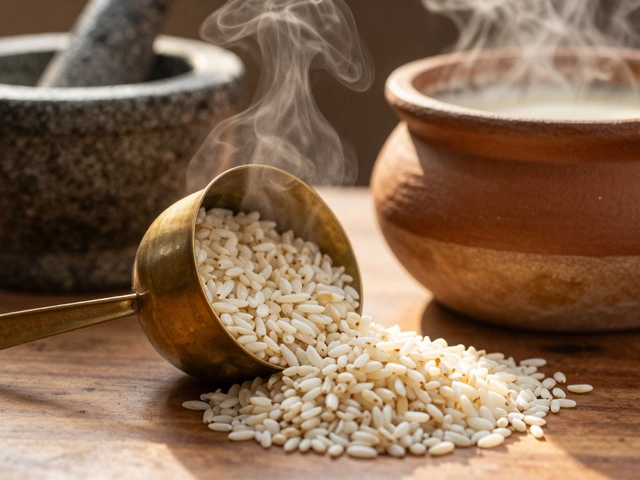
Picking the right flour is a key step if you're aiming for that perfectly soft roti. In the world of roti making, there's a specific type of flour that stands out: attah. This whole wheat flour is super fine and perfect for making roti that are both soft and sturdy enough to hold all your favorite fillings.
Why atta? Regular whole wheat flour doesn't quite cut it. The milling of atta is finer, and it typically has a higher level of bran, which affects the dough's elasticity and hydration capabilities. In roti making, this means you get a softer dough that's easier to work with and rolls out with less effort.
"The right flour can make or break your roti," says culinary expert Meera Pathak. "Switching to atta was a game-changer for me and for many others who grew up eating softer, fluffier flatbreads."
Be careful of choosing flour labeled just 'whole wheat', especially if it doesn't specify its intended use for bread or flatbreads. This flour tends to have a different grind and might lead to denser rotis. Remember, flour isn’t just flour in the roti world!
If you're experimenting, try blending atta with a small percentage of all-purpose flour. This mix can give you added softness and still maintain some of the nutritional benefits. But keep it around 10-15%, as too much all-purpose flour might take away that signature roti taste and texture.
The Secret of Dough Hydration
Alright, let's dive into the magic of dough hydration. If you're after that velvety, soft roti, getting the water-to-flour ratio spot on is crucial. Many home cooks might overlook this step, but it's a game-changer.
The trick is to add water gradually when mixing your roti dough. Start by pouring a small amount of water into your flour and mix it with your fingers, not a spoon. Feel the dough as you go; it should start to pull together and feel pliable.
How Much Water is Just Right?
Typically, you'll need about three-quarters of a cup of water for every cup of flour. That said, this isn't set in stone. Humidity and the type of flour can affect the exact amount needed. Some cooks recommend slightly warm water, as it helps in activating the gluten, creating a soft structure.
Kneading: A Gentle Art
Once all the flour is combined, knead the dough for about 8-10 minutes. You want a smooth, supple dough that springs back when touched. If it feels tight, let it rest for a few minutes, then give it a gentle knead again.
Don't Rush the Resting Time
Now, here's a pro tip: let your dough rest for at least 15-20 minutes. This allows the gluten to relax, making it easier to roll out later. And trust me, your roti will thank you when it comes to puffing nicely on the tawa.
Hydration is such a crucial factor in ensuring the perfect balance for your roti making adventure. Remember, a well-hydrated dough is your first step to success.
Kneading Techniques
Ever wonder why your roti isn’t as soft as you hoped? It might come down to how you knead the dough. Kneading isn’t just about mixing; it’s about developing the gluten that makes your flatbread pliable and soft. Think of gluten as the magic elastic band that holds everything together.
Why Kneading Matters
Kneading helps combine water and flour perfectly, breaking down any lumps and ensuring the dough is smooth. It also activates the all-important gluten network that gives roti its soft, chewy texture. If you skip or rush through this step, you might end up with tough, rather than soft, roti.
Effective Kneading Steps
- Mix Initial Ingredients: Combine your flour, water, and a pinch of salt in a mixing bowl until it starts to come together. Use your fingers to bring everything into a shaggy ball.
- Get Your Hands In: Turn the dough onto a lightly floured surface. Fold the dough in half towards you, then push it away using the heel of your hand.
- Repeat Motion: Rotate the dough slightly, repeat the fold and push motion. This rhythmic action helps develop gluten effectively.
- Continue Kneading: Keep going until the dough is smooth and elastic—usually about 8-10 minutes. Test by gently pressing; it should bounce back slightly.
- Rest Time Is Crucial: After kneading, cover the dough and let it rest for at least 20 minutes. This helps the gluten relax and ensures the dough won't shrink back while rolling.
Pro Tips
- If using a stand mixer, use a dough hook and let it work on medium speed for 6-8 minutes. It can save some arm work!
- Want to make your roti soft with minimal effort? Use warm water when mixing ingredients; it helps dissolve and distribute elements evenly.
- Don't over-knead! Too much kneading can make the dough tough and hard to manage.
Controlling Cooking Temperature
Temperature control is one of the secrets to achieving soft, delicious roti. Ever wonder why some turn out crisp while others stay tender? It all comes down to how you handle the heat.
Preheating Your Pan
Before you even start cooking, make sure your pan—ideally a cast iron skillet or tava—is hot enough. A well-heated pan ensures that your roti cooks evenly and quickly, keeping it soft. You can test this by sprinkling a little water on the pan; if it sizzles and evaporates right away, you're good to go.
Cooking Time and Temperature
When it comes to actually cooking, keep your pan at medium to high heat. Cooking roti on too low a heat makes it tough and chewy. Here's a simple step-by-step guide:
- Place your flattened dough on the pan. Wait about 30 seconds until you see small bubbles starting to form.
- Flip it over. Cook for another 30 seconds on the other side.
- Now, turn the heat to high and use a cloth or spatula to lightly press down, making the roti puff up—this is where it gets soft and airy.
Handling Multiple Rotis
Cooking for a group? Resist the urge to stack hot roti directly on each other. Always cool them slightly, or place a kitchen towel in between to prevent steaming, which can make them soggy.
Consistency is key when you're aiming for that perfect roti. Play around with your stove’s settings, as all stoves are a little different, but soon you’ll find the sweet spot. It’s this careful control of temperature that makes the magic happen in your home kitchen.
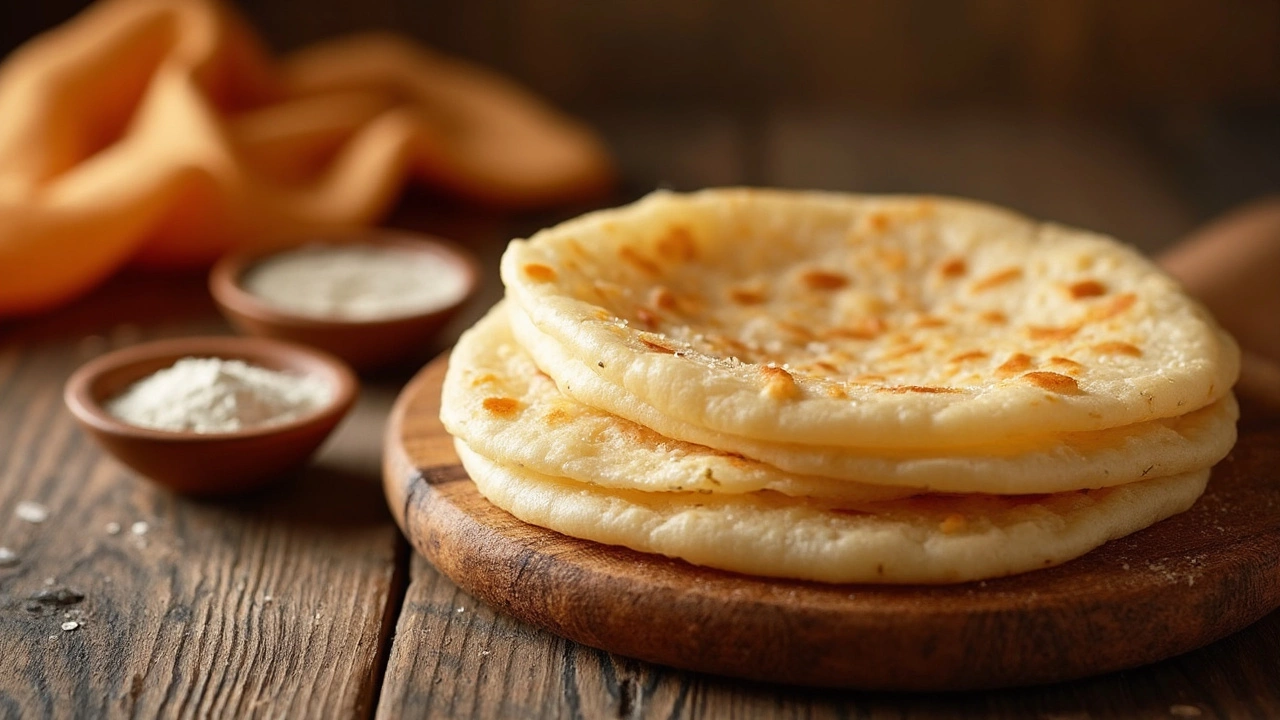
The Art of Roasting
Roasting your roti just right is a real skill but don't stress—it's easier than you think. Let's break it down in a way that'll help you master this art. The key here is balance. You want a nice golden brown color, with those little cooked spots that just scream deliciousness! So, how do you get there?
Heating Up Your Tawa
First things first, your tawa or flat pan should be hot before your roti even touches it. A common rookie mistake is putting the roti on an under-heated tawa, leading to dry or unevenly cooked rotis. Try this: flick a little water on your tawa; if it sizzles and evaporates quickly, you're good to go.
Timing Is Everything
Here's a simple trick: cook the first side of the roti until bubbles start to appear and the color changes slightly. Then it's time to flip. Cook the other side a bit longer, until you see those lovely brown spots.
- First side: About 20 seconds
- Second side: Around 30-35 seconds
- Final step: Use tongs to lift it directly on the fire for a few seconds to puff up
Perfect Puff
For that classic 'puffed-up' look, apply gentle pressure with a soft cloth (or a spatula) on the edges of the roti after flipping. This little push makes your roti puff beautifully! Don’t press too hard or you'll end up with a flat, sad-looking bread.
Take note: Every stove and tawa is a little different, so keep an eye on your rotis and adjust the heat accordingly. If you notice them browning too fast, lower the heat. Cooking rotis is a bit of an art and it takes a few tries to find the perfect rhythm, but once you do, you'll be serving up soft, picture-perfect rotis every time!
Storing Rotis for Freshness
Keeping rotis soft isn't just about how you make them; it’s also about how you store them. Let's make sure your roti stays fresh and tasty long after it's been cooked. Here's what you need to know.
Use an Airtight Container
As soon as your rotis are off the stove, let them cool for a brief moment and then place them in an airtight container. This helps trap in moisture and keeps them from drying out. Unlike leaving them in open air, where they’ll harden fast, a sealed environment works wonders.
Wrapping Rotis with Care
A piece of advice passed down through generations: wrap those rotis in a clean cotton cloth or even a paper towel before placing them in the container. This absorbs any extra moisture, preventing them from getting soggy, while still maintaining that ideal soft texture.
Refrigerating Rotis
Need to store them for more than a day? Pop them into the fridge. Make sure they are in a good container to keep the cold air from drying them out. Whenever you're ready to eat, reheat them on a tava or griddle for the best results.
Freezing for Future Use
If you want your rotis to last even longer, consider freezing. Place a piece of parchment or wax paper between each roti, then seal them in a freezer bag, pushing out as much air as possible before sealing. They can last up to a month this way!
Reviving Leftovers
Leftover rotis not as soft as you'd like? Sprinkle a little water over them and warm them up in a covered pan, or wrap them in a damp paper towel and microwave them for 10-15 seconds. Presto, they're almost as good as new!
| Storage Method | Duration |
|---|---|
| Airtight Container | Up to 12 hours |
| Refrigerator | 2-3 days |
| Freezer | Up to 1 month |
Whether you're crafting roti for a meal today or planning ahead for the week, these tips ensure you always enjoy a tender, fresh bite.
- Poplular Tags
- roti soft
- roti making
- flatbread tips
- cooking advice