Ever looked at that half-empty carton of spoiled milk and wondered if there's something you could do with it instead of just tossing it in the trash? Well, it might surprise you to know that you can turn it into paneer, a simple form of cheese popular in Indian cuisine. This isn't just a savvy way to cut down on food waste; it's a neat trick to have up your culinary sleeve.
You might be thinking, 'Isn't spoiled milk dangerous?' In some cases, sure. But when milk starts to sour, it's mostly because the natural bacteria are converting lactose into lactic acid, thus making it more acidic. This change in acidity is actually what helps milk curdle, a key step in making paneer.
Of course, we're talking about milk that's just a bit sour, not milk that's turning into a science experiment with mold and more colors than a painter's palette. As long as the milk doesn’t smell putrid or have mold floating in it, you're good to go.
Here's the kicker—the process is really simple. All you need is some heat, a bit of patience, and maybe a little lemon juice or vinegar to give things a nudge. We'll dive into the step-by-step process soon, but first, let's talk about why spoiled milk works just as well as fresh milk for this culinary delight.
- The Science of Spoiled Milk
- Turning Spoiled Milk into Paneer
- Safety Tips and Considerations
- Creative Recipes Using Paneer
The Science of Spoiled Milk
Let's get into the nitty-gritty of why spoiled milk might just be your next best friend in the kitchen. When milk spoils, what you’re seeing is a natural process at work. The bacteria in milk start breaking down the lactose into lactic acid. This gradually changes the milk’s acidity level, which is why spoiled milk tastes sour and can sometimes smell a bit off.
But here's where it gets interesting. That lost sweetness and gained tang are precisely what allows us to turn milk into paneer. The increased acidity makes the milk proteins, mainly casein, come together and form curds. It's fascinating because other cheese-making processes rely on added acids or rennet to achieve this curdling effect. With spoiled milk, nature gives us a head start.
How Acidic is Too Acidic?
Not all spoiled milk is created equal. We're talking about milk that's gone slightly bad—enough to curdle but not so bad that it's a danger zone of bacteria. If it looks like a biology experiment gone wrong, it's best to avoid it. A good rule of thumb is: if it smells more like yogurt and less like a chemical spill, you're good to go.
The Friendly Bacteria
Ever heard of probiotics? Those are the good bacteria you find in yogurt and fermented foods. Turns out, spoiled milk often has some probiotic friends that actually compete with spoilage bacteria, making it somewhat less risky than you'd think. Just be sure it's only a little sour—not disgusting—and your paneer could still be on the docket.
| pH Level | Stage of Milk |
|---|---|
| 6.5 - 6.7 | Fresh Milk |
| 4.5 - 5.5 | Optimal for Curdling |
| Below 4.5 | Too Sour |
In summary, understanding the sweet spot where your spoiled milk becomes perfect for making paneer is all about gauging that tangy twang without crossing the line into yuck territory. Nature does most of the work for us, turning a waste into a culinary asset!
Turning Spoiled Milk into Paneer
Alright, let’s get to the fun part—actually transforming your spoiled milk into delectable homemade paneer. If you're concerned about safety, as we mentioned earlier, it's all about ensuring the milk is only slightly sour. No funky smells or floating bits allowed!
Gather Your Tools
You'll need a few basic kitchen tools: a large pot, a stirring spoon, a cheesecloth or a clean kitchen towel, and a strainer. If you don't have a cheesecloth, a thin cotton kitchen towel works just as well.
Cooking the Milk
- Pour the spoiled milk into the pot. Put it on the stove over medium heat. Stir gently to avoid scorching. You don't need it to boil, just get it to a nice simmer.
- Once it's hot, add an acid to encourage curdling. You can use any of these: a couple of tablespoons of lemon juice or vinegar. Stir gently as you add it.
- Watch closely as the milk starts to separate into solid curds and liquid whey. It usually happens pretty quickly, within a couple of minutes.
Draining and Shaping
- Once you've got your curds, remove the pot from the heat. Line the strainer with your cheesecloth or towel and place it over a sink or a large bowl.
- Carefully pour the curds and whey into the strainer. Let it sit for about 30 minutes so most of the liquid can drain away.
- If you want firmer paneer, you can gather the cloth’s edges and twist to extract more moisture, then place something heavy on top to press it (like a pot filled with water).
And there you have it! Once the paneer is drained, it's ready to be cut up and used in your favorite dishes.
| Ingredient | quantity |
|---|---|
| Soured Milk | 1 Liter |
| Lemon Juice/Vinegar | 2 to 3 Tbsp |
This process not only makes good use of milk that would otherwise go to waste, but it's surprisingly easy and satisfying. You get fresh, soft cheese that’s perfect for grilling up some tikka or adding to curry. Plus, knowing the process makes you a little bit of a kitchen hero!

Safety Tips and Considerations
So you've got this carton of spoiled milk and you're eager to make homemade paneer. Awesome! But before diving in, let's chat about safety manners to keep this cheese expedition delightful and safe.
Check the Milk
First off, give that milk a sniff test. If it smells like something crawled in and died, it's definitely too far gone. We're looking for a slight sourness, not a noxious odor. Also, inspect for any mold—if you see anything furry or colorful, toss it. Better safe than sorry!
Handling and Heating
Once you've ensured the milk's haven't-gone-too-bad-yet status, it's heating time. Bring it just to a boil. The high heat helps kill off any unfriendly bacteria that may have started forming. Stir frequently to prevent sticking or burning.
Add the Acid with Care
Whether you're using lemon juice or vinegar to curdle the milk, start small. You can always add more, but you can't undo it if the balance tips too far. Start with a tablespoon at a time, stirring slowly.
Use Clean Utensils
This might sound obvious, but cleanliness matters. Make sure all your tools, from the pot to the strainer, are clean before you start. This cuts down on the risk of contaminating your paneer.
Storage
Once your paneer is made, store it in a clean container in the fridge. It should last about a week's time. To keep it fresh, consider submerging it in clean water or whey. Just change it every couple of days.
And there you have it—turning spoiled milk into paneer can be perfectly safe as long as you follow these easy steps. It's all about using your senses and staying hygienic. Get ready to impress with your kitchen smarts and zero food waste philosophy!
Creative Recipes Using Paneer
So, you’ve made your paneer from that leftover spoiled milk—awesome! But now you might be scratching your head, wondering what to do with this tasty block of homemade cheese. Don’t worry, I've got you covered with a few easy recipes that will make your taste buds dance.
Paneer Tikka Skewers
If you've ever been to an Indian restaurant, you might have seen paneer tikka on the menu. It's as delicious at home as it is when dining out. You'll need some yogurt, a dash of lemon juice, and a blend of spices like cumin, coriander, and turmeric to marinate your paneer chunks.
- Cut the paneer into small cubes.
- Mix it with yogurt, lemon juice, and spices in a large bowl.
- Let it marinate for at least an hour.
- Thread the paneer onto skewers along with your choice of veggies, like bell peppers and onions.
- Grill or bake until you see some golden brown char marks. Yum!
Simple Paneer Stir Fry
Looking for a quick and easy meal? A paneer stir fry is your best buddy. It takes less than 15 minutes!
All you need is your homemade paneer, some soy sauce, a splash of vinegar, and any veggies you've got lying around.
- Heat some oil in a pan.
- Add your paneer cubes and fry until they're golden.
- Throw in your veggies and stir around.
- Splash some soy sauce and vinegar, mixing everything up.
- Serve hot with rice or enjoy as-is for a low-carb delight.
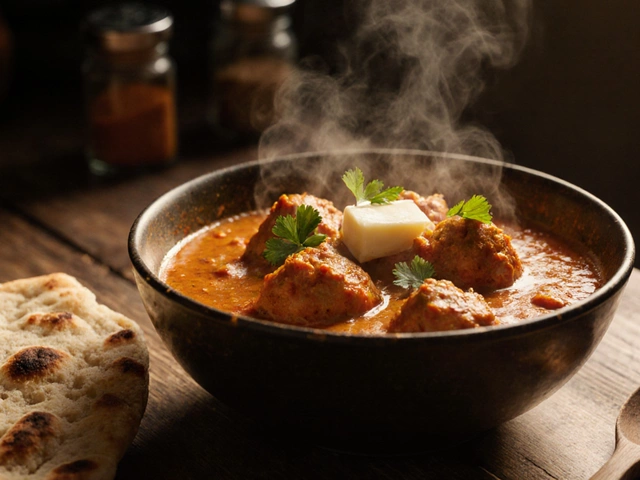
Smooth Paneer Makhani
If you’re ready to take on a slightly more elaborate dish, paneer makhani, known for its creamy buttery taste, is a must-try. It involves blending tomatoes, butter, cream, and—of course—your star ingredient, paneer.
- First, blend tomatoes into a smooth paste.
- Heat butter in a pan, add the tomato paste, and cook until it thickens.
- Add spices like garam masala and chili powder for that traditional flavor.
- Stir in cream for the rich texture.
- Add paneer cubes at the end and let them soak up the flavors.
So, there it is—taking your kitchen’s savior, paneer, and turning it into something totally crave-worthy. Whether you’re grilling, stir-frying, or going for a creamy concoction, these recipes will have your meals anything but boring.
- Poplular Tags
- spoiled milk
- homemade paneer
- cheese making
- kitchen hacks


