So, you're ready to make roti but suddenly pause at the flour. How much is just right? Let's demystify that. For a single, satisfying roti, you'll typically need about 1/4 cup of whole wheat flour. It's like having that perfect ratio in a cake recipe—you wouldn't want it too dense or too crumbly, right?
The key here is not just about measuring but understanding the texture you want. Flour consistency can vary a bit depending on humidity and the type of wheat. So if you're in a humid area or using a different kind of flour, you might need to tweak things a bit. It's all about that feel.
Think of dough as a workout partner. It should feel firm but not too tight. If it's too sticky, just sprinkle a bit more flour. If it's cracking, splash a little water. And yes, kneading is important! It's like therapy for dough—makes it smooth and ready for the pan.
Understanding Flour Ratios
When it comes to making the perfect roti, getting the flour ratio right is crucial. It's the foundation of your cooking process. A typical rule of thumb is using about 1/4 cup of flour for a single roti. But why is this ratio important, and when should you adjust it?
The Role of Flour Quality
The type of flour significantly impacts your roti's texture and flavor. Traditional rotis often use whole wheat flour, which provides a hearty, slightly nutty taste. Different brands can vary significantly in texture. Finer flours might need a little less water, while coarser flours could require more.
In areas with high humidity, flour can absorb moisture from the air. You might need a bit less water than usual. Always keep an eye on the dough's consistency, adjusting flour or water as needed. A good tip is to start with less water and add gradually.
Why Ratios Matter
Using the right flour-to-water ratio is like having a reliable recipe. Too much flour, and you might end up with tough, chewy dough. Too little, and it could turn sticky, making it hard to roll. If you've wondered why your rotis aren't as soft as you'd like, consider tweaking the flour-to-water balance.
| Ingredient | Quantity per Roti |
|---|---|
| Whole Wheat Flour | 1/4 cup |
| Water | 1/8 cup (approx.) |
This basic guideline is a starting point. With practice, you'll develop a feel for the dough, learning to adjust ratios based on your environment and personal preference. The secret? Staying flexible and experimenting a bit!
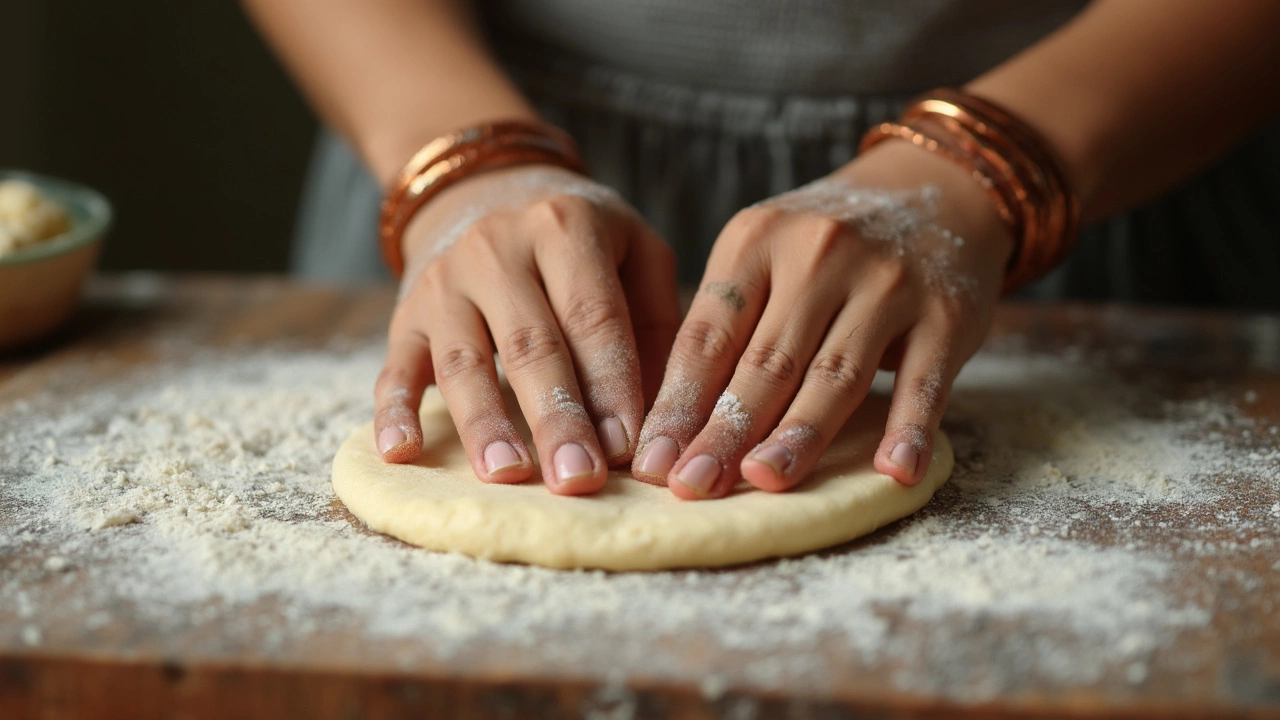
Kneading Tips
Kneading is where the magic happens in roti making. Get it right, and you're halfway to that soft, fluffy result. So how do you nail the kneading part?
The Perfect Technique
First things first, it's all about handwork—no need for a fancy machine here. Start by folding the dough inward, using the heel of your hand. Push it away, then fold again. You're aiming for a smooth, elastic texture.
A good rule of thumb? Knead for about 8-10 minutes. If the dough springs back when poked, you're on the right track.
Common Mistakes
Avoid adding too much flour while kneading. Sure, sticky dough can be a headache, but resist over-flouring. It can make your roti tough. Instead, let the dough rest for 15-30 minutes. It helps it absorb the water better.
- If your dough's too sticky, add a teaspoon of oil and mix.
- For a dry dough, sprinkle a bit of water gradually while kneading.
- Don't knead in a hurry. Rushing can lead to uneven gluten development, making your roti uneven too.
Little Pro Tips
Sneak in a pinch of salt and a teaspoon of oil into the flour before kneading. It adds a nice flavor and the oil makes the dough more pliable. Do you know that about 70% of our buddies prefer the oil method for a softer result?
And here's a quirky fact: some folks like to double knead, just like double-checking your work. They'll knead, rest, and knead again for added softness. Try it out if you have the time and let me know how it goes!
Cooking Techniques
Cooking a roti to perfection isn't as daunting as it sounds, once you get the basics down. One of the tricks lies in the heat level of your pan. A thick-bottomed pan is ideal because it distributes heat evenly. If you have a cast iron skillet, you're already a step ahead!
Heat Control
Start by heating your pan on medium-high. To check if it's ready, sprinkle a small drop of water on it. If it sizzles away fast, you're good to go. Here's a fun tip: once you're more experienced, you'll get a hang of listening to the roti. The crackling sound means it's cooking at the right pace!
Flipping Timing
Get ready to flip at just the right moment. You'll want to flip it when you see bubbles forming on the surface. This is usually about 10-15 seconds in. Then, let it cook on the other side for a similar amount of time, and give it another flip.
Puffy Finish
This is where the magic happens! Press gently with a spatula or use a cloth to push the edges. If all goes well, you'll see your roti puff up. Not only is that satisfying to watch, but it also means your roti is cooked evenly.
Final Touches
Once off the pan, smear a dab of clarified butter (ghee) on top if you want an authentic touch. It adds that little extra flavor that elevates your roti to another level.
Here's a quick cooking time guide:
| Step | Time |
|---|---|
| Initial Cook | 10-15 seconds per side |
| Final Cook | 30 seconds, pressing to puff |
Remember, practice makes perfect. So don't worry if your first few rotis aren't round like a record. It's all part of the journey!
Troubleshooting Problems
Even with the best prep, making the perfect roti might not always go as planned. Don't worry, I’ve got your back. Here’s how to tackle some common roti issues:
1. Roti Too Thick or Hard
If your roti resembles a frisbee more than a delicate flatbread, the dough might be too dense. This happens if there's too much flour or insufficient water. Keep your dough soft and pliable. Think of it like a soft play dough. Add water gradually and knead until it feels right.
2. Roti Not Puffing Up
This one's a bummer. When the roti doesn’t puff, it might be due to uneven rolling. Ensure that each roti is rolled evenly and not too thin—you want it just around 2 mm thick. Also, the pan should be hot enough. Think of it like preheating an oven.
3. Roti Sticking to the Skillet
Nothing’s more annoying than a roti glued to a pan. Your skillet might need a bit of seasoning. Rub a few drops of oil on the pan before it heats up. Alternatively, dust the roti with a little flour while rolling to avoid stickiness.
4. Uneven Cooking
If one side seems like it's been toasting more than the other, the issue might just be with your stove’s heat distribution. Try rotating the roti halfway while it’s cooking. Keep an eye on those spots that cook faster and adjust accordingly.
5. Roti Getting Too Dry
This could be a sign of adding too much flour while rolling or cooking at too low a temperature. Roll them out with minimum dusting, and make sure the pan’s adequately hot. Store cooked roti in a warm container covered with a cloth to keep them soft.
Fixing roti problems is all about adjusting your technique a bit. Practice makes perfect, and soon, you’ll be rolling out delicious roti in your sleep! If you've got any tricks of your own, don't be shy—I’m always eager to learn new roti making tips!
- Poplular Tags
- flour
- roti making
- cooking tips
- perfect roti